前言
Thymeleaf是一个适用于Web和独立环境的现代服务器端Java模板引擎。
Thymeleaf的主要目标是为您的开发工作流程带来优雅的自然模板 - 可以在浏览器中正确显示的HTML,也可以用作静态原型,从而在开发团队中实现更强大的协作。
通过Spring Framework模块,与您喜欢的工具的大量集成,以及插入您自己的功能的能力,Thymeleaf是现代HTML5 JVM Web开发的理想选择 - 尽管它可以做得更多。
——摘抄自Thymeleaf官网介绍 链接:https://www.thymeleaf.org/index.html
Thymeleaf与Velocity或FreeMarker等其他模板引擎相比如何?
Velocity 和 FreeMarker 都是非常棒的软件,但是它们处理模板问题的原理与Thymeleaf 完全不同。
Thymeleaf 非常强调自然模板化——允许模板成为工作原型,而其他两个模板不允许这样做——它的语法试图(可以说)更干净,更符合当前 web开发的趋势。另外,从架构的角度来看,Velocity 和 FreeMarker 都是顺序文本处理器,而 Thymeleaf 是基于标记解析技术的。这允许 Thymeleaf 利用特定于基于标记的环境的有趣特性,特别是web。
无论如何,比较这些技术的最好方法是自己使用它们,并感觉哪个最适合你。
以上内容来自Thymeleaf官网 链接: https://www.thymeleaf.org/faq.html#compare-other-engines
SpringBoot使用Thymeleaf 操作步骤
第一步是引入Thymeleaf starter依赖,具体代码如下:
		<!-- thymeleaf 相关依赖 -->
		<dependency>
		    <groupId>org.springframework.boot</groupId>
		    <artifactId>spring-boot-starter-thymeleaf</artifactId>
		</dependency>
第二步是在 application.properties 添加 Thymeleaf 相关配置,具体配置如下:
server.port=8090
server.servlet.context-path=/sbe

#关闭 Thymeleaf 的缓存开发过程中无需重启
spring.thymeleaf.cache = false
#设置thymeleaf页面的编码
spring.thymeleaf.encoding=UTF-8
spring.thymeleaf.mode=HTML5
#设置thymeleaf页面的后缀
spring.thymeleaf.suffix=.html
#设置thymeleaf页面的存储路径
spring.thymeleaf.prefix=classpath:/templates/
第三步是编写访问 Thymeleaf 页面 Controller。
@Controller
@RequestMapping("/hello")
public class ThymeleafHelloWrodController {


	@RequestMapping("/thymeleaf")
	public String helloThymeleaf(Model model){

		model.addAttribute("hello","hello Thymeleaf!");
		return "hello/index";
	}
}
Thymeleaf 页面代码如下:
<!DOCTYPE html>
<html xmlns:th="http://www.thymeleaf.org">
<head>
<meta charset="UTF-8">
<title>Insert title here</title>
</head>
<body>
	<p th:text="${hello}">hello</p>
</body>
</html>
测试
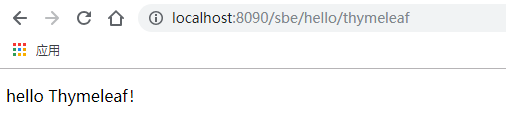
在游览器输入访问 Thymeleaf 页面的 Controller 的 URL:http://localhost:8090/sbe/hello/thymeleaf 进行测试,测试结果如下:
小结
SpringBoot 使用 Thymeleaf 步骤如下:
- 引入Thymeleaf starter依赖
- 添加 Thymeleaf 相关配置
- 编写访问 Thymeleaf 页面和 Controller
代码示例
具体代码示例请查看我的GitHub 仓库 springbootexamples 中的 spring-boot-2.x-thymeleaf 下的 helloword 包下查看。
GitHub:https://github.com/zhuoqianmingyue/springbootexamples
如果您对这些感兴趣,欢迎 star、或点赞给予支持!转发请标明出处!